
For homeowners relying on oil furnaces for heating, understanding the basics of system maintenance can greatly improve efficiency and longevity. One common issue faced is the presence of air in the furnace line. Air in the oil line can lead to inefficient furnace operation and even cause the system to shut down. This guide provides a step-by-step approach to removing air from an oil furnace line, a critical skill for homeowners seeking to maintain their heating system effectively.
The Importance of Removing Air from the Line:
Air can enter the oil furnace line during routine maintenance, a fuel refill, or if there’s a leak in the system. When air gets trapped, it prevents the smooth flow of oil, causing the burner to misfire or not ignite at all. This can lead to inefficiencies in heating and increased fuel consumption. Regularly bleeding the line to remove air ensures that the furnace operates at peak efficiency, providing consistent heat while conserving fuel.
Safety Precautions:
Before beginning the process of bleeding the line, safety must be your top priority. Ensure the furnace is turned off and cool to the touch. Wear protective gloves and eyewear to protect against potential oil splatters. Work in a well-ventilated area, as fumes from the oil can be hazardous. It’s also wise to have some rags or paper towels handy for any spills.
Step-by-Step Guide to Bleeding the Oil Furnace Line:
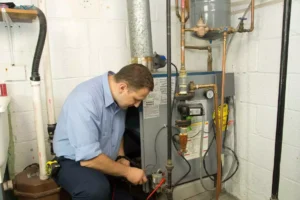
- Locate the Bleeder Valve: The bleeder valve is typically located on the furnace’s burner pump. Consult your furnace manual to accurately locate it. The valve usually looks like a small nut or screw.
- Prepare the Area: Place a container under the bleeder valve to catch any oil that comes out. Have rags or paper towels ready for any spills.
- Open the Bleeder Valve: Use a wrench to slowly open the bleeder valve. Be prepared for a small amount of oil to come out immediately.
- Turn on the Furnace: Once the valve is open, turn on the furnace. Oil and air will begin to sputter out of the valve.
- Watch for a Steady Stream of Oil: Wait until the air has been expelled and a steady stream of oil flows from the valve. This indicates that most of the air has been bled from the line.
- Close the Bleeder Valve: Once you have a steady stream of oil, close the bleeder valve securely using the wrench.
Post-Bleeding Checks:
After you’ve completed the bleeding process, it’s important to check the furnace’s operation. Turn on the furnace and observe if it ignites smoothly and runs without any interruptions. Monitor the system for a few hours to ensure consistent operation. Check the area around the bleeder valve for any signs of leaks and clean up any spilled oil.
Regular Maintenance:
Bleeding the oil line should be part of your regular furnace maintenance routine. It’s often necessary after a fuel delivery or any service on the furnace. Regular maintenance checks by a professional
are also crucial. They can identify and fix potential issues that might cause air to enter the line, like leaks or blockages. A well-maintained furnace not only runs more efficiently but also saves you money on fuel and reduces the risk of unexpected breakdowns.
Conclusion:
Removing air from your oil furnace line is a vital maintenance task that ensures the efficient operation of your heating system. By following these steps, homeowners can effectively address this common issue, enhancing the performance and reliability of their oil furnace. However, it’s essential to prioritize safety and follow the instructions carefully. If you’re ever in doubt, or if the problem persists after bleeding the line, it’s advisable to seek assistance from a professional technician. Regular maintenance, including professional checks and timely bleeding of the oil line, is key to a warm and comfortable home during the colder months. Remember, a little preventive care can go a long way in ensuring the longevity and efficiency of your oil furnace.