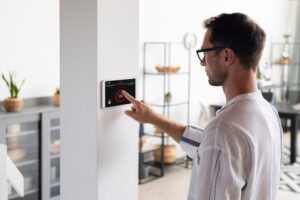

The pilot light in a water heater is a small flame that ignites the gas burner, which in turn heats the water. If your water heater’s pilot light goes out, the water won’t be heated, leading to a lack of hot water in your home. This guide provides a detailed, step-by-step approach to safely and efficiently restarting the pilot light on your water heater.
Understanding the Importance of the Pilot Light:
The pilot light is an essential component of a gas water heater. It’s a small, continuously burning flame that ignites the main burner when the water in the tank needs to be heated. If the pilot light extinguishes due to reasons like a sudden draft, a dirty pilot tube, or a malfunctioning thermocouple, it can prevent your water heater from functioning.
Safety Precautions:
Before attempting to relight the pilot light, safety should be your primary concern:
- Turn off the Gas: Locate the gas knob on your water heater and turn it to the “Off” position. Wait for 5 to 10 minutes to let any accumulated gas dissipate.
- Avoid Flammable Materials: Ensure there are no flammable materials or vapors near your water heater.
- Ventilation: Work in a well-ventilated area to avoid the buildup of gas fumes.
Steps to Relight the Pilot Light:
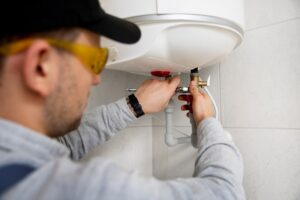
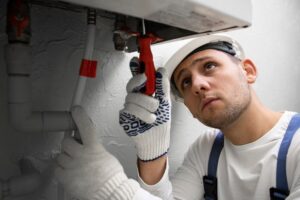
- Locate the Pilot Light Assembly: The pilot light assembly is typically located at the bottom of the water heater. You may need to remove a small access panel to get to it.
- Set the Gas Knob to ‘Pilot’: After the gas has dissipated, turn the gas knob on your water heater to the “Pilot” position. This setting allows gas to flow only to the pilot burner.
- Ignite the Pilot Light: Depending on your water heater model, you may have a built-in ignition button, or you may need to use a long lighter. If your model has an ignition button, press and hold it down. If using a lighter, hold the flame to the pilot opening.
- Hold Down the Gas Knob or Button: Continue holding the gas knob or ignition button for about one minute after the pilot light is lit. This allows the thermocouple to heat up and sense that the pilot light is on.
- Check the Pilot Light: Release the knob or button and observe if the pilot light stays lit. If it goes out, repeat the process.
- Turn the Gas Knob to ‘On’: Once the pilot light stays lit, turn the gas knob to the “On” position. This will enable the main burner to ignite and heat the water.
Post-Restart Checks:
After relighting the pilot, observe the water heater for a few minutes to ensure that it is functioning correctly. Listen for the sound of the main burner igniting and check for any signs of gas leaks.
When to Seek Professional Help:
- If the pilot light does not stay lit after several attempts, it may indicate a problem with the thermocouple or gas supply.
- If you smell gas or suspect a leak, turn off the gas supply and call a professional immediately.
- Regular maintenance checks by a qualified technician can prevent issues related to the pilot light and ensure the longevity and safety of your water heater.
Conclusion:
Restarting the pilot light on your water heater is a manageable task for most homeowners. By following these steps, you can often quickly resolve issues related to a extinguished pilot light. However, it’s important to recognize when a problem requires professional attention. Regular maintenance and timely intervention by a qualified technician are crucial to the safe and efficient operation of your water heater. Understanding how to properly maintain your water heater, including how to safely restart the pilot light, is an important aspect of responsible homeownership, ensuring a steady supply of hot water for your household needs.